By Fritz Dahlin
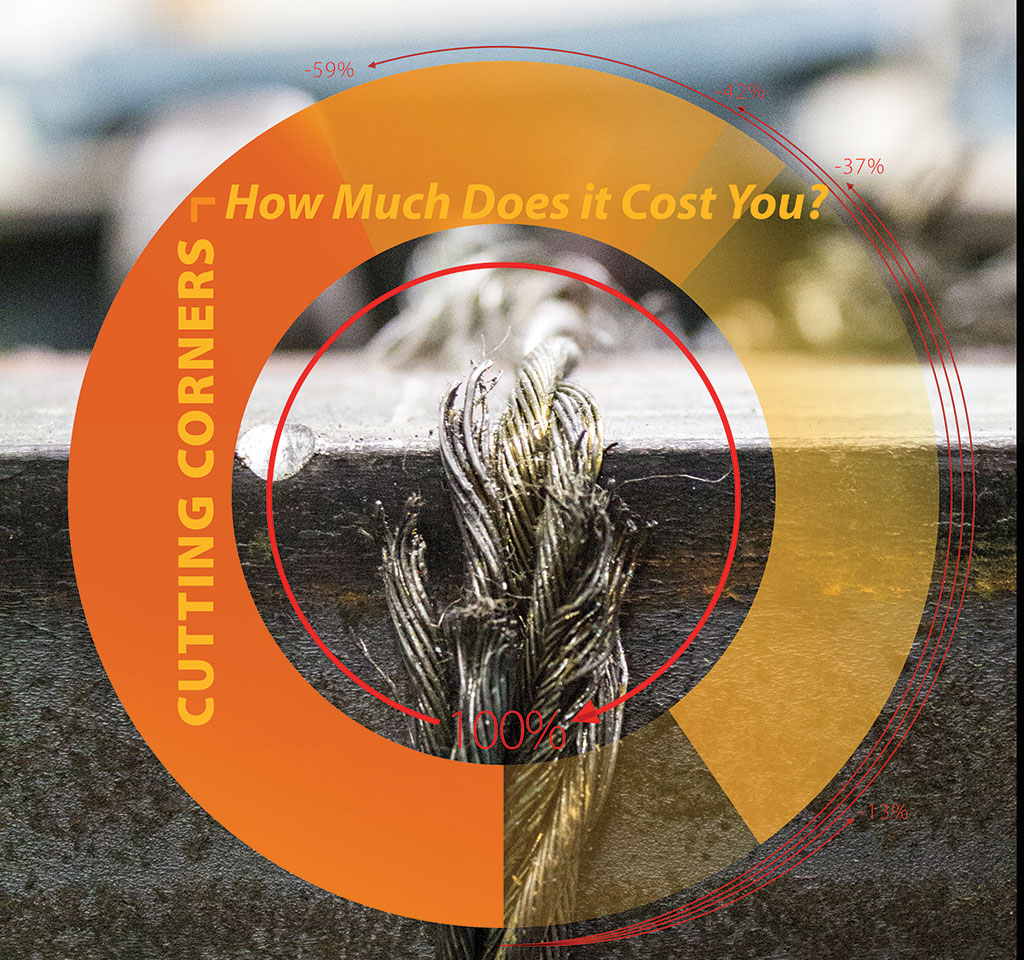
Note: Please be aware that this testing was done with new product under controlled conditions. NO product should EVER be used above its WORK LOAD LIMIT. Minimum break strengths should NEVER be used to determine the suitably of a product. Failure to follow these warnings may result in property damage, personal injury or death. The intention of this article is to show the effect of improper loading over a corner has on the product.
One of our salesmen called me back to his desk the other day. He said, “So and so sent me a picture of a strap that broke. Can you take a look at it and see what you think?” I said, “Sure. Pull it up.” As soon as the picture opened, I said, “It was cut.” He asked, “How do you know?” “Easy.” I said. “Those hundreds of fibers did not all break at the same time and same place for no reason.”
Now, as much as I’d like to say I thought that up all by myself, I can’t. Credit goes to Michael Gelskey, a fellow member (and past president) of the Web Sling Tie Down Association. One of my jobs at B/A Products Co. is to attend the semi-annual WSTDA meetings. We talk about exciting stuff like the recommended pin diameter for testing 12” slings, what the minimum corner radius round slings should be loaded over, and my personal favorite, whether poly and nylon slings should be washed or not.
Mike gave a presentation about a sling his company made that failed and resulted in a fatality. As he told the story, there was a picture of the sling on the screen. The sling had been laid over the angle iron arm of a transmission tower. The sling was laid over the arm of the tower, unprotected, and loaded repeatedly. The arm of the tower contacted the same place on the sling each time it was loaded, until it wore through (cut) the sling with catastrophic results. To those of us in the web industry, the cause was obvious. To many outside the web industry or those who may not have been trained on proper use and inspection of web slings, it may not be. And I won’t limit that statement to web. Wire rope and chain, when used in a manner that they are not designed for, or are not protected from damage, will fail. They will also leave telltale signs. The goal of this article is to make you aware of the damage that a seemingly innocent corner can cause, the signs that a piece of web or wire rope was damaged or cut, and some basic inspections that must be performed on a regular basis.
TEST SET UP AND PARTICULARS
I wanted to recreate some things that I see on a fairly regular basis. Another of my jobs at B/A is to do the testing of inbound materials, as well as inspecting returns to try and determine cause of failure, so I have not only seen a lot of broken things, but I have broken my share of them, as well. I decided to try to replicate what happens when a piece of wire rope or web is pulled over a 90 degree corner.
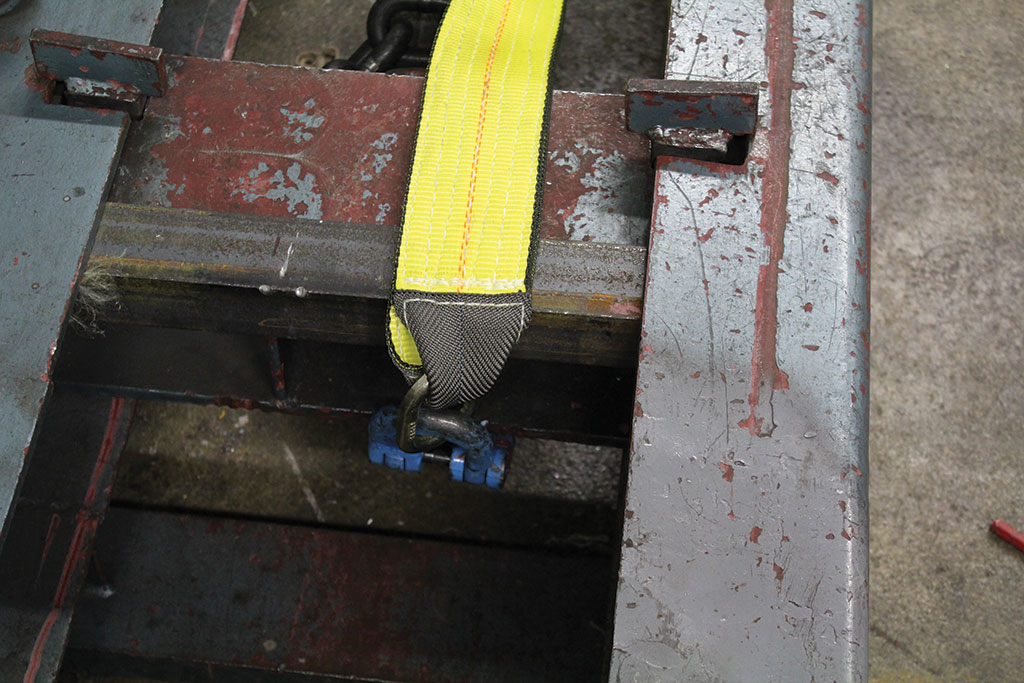
To set up the tests, I cut several lengths of 2” x 2” x 3/16” angle iron to fit over the top edge of the carriage of one of our test beds. I then figured a way to secure a piece of tie down web, wire rope, 2” 2 ply sling and a V strap leg so it was pulled over the outside corner of the angle iron.
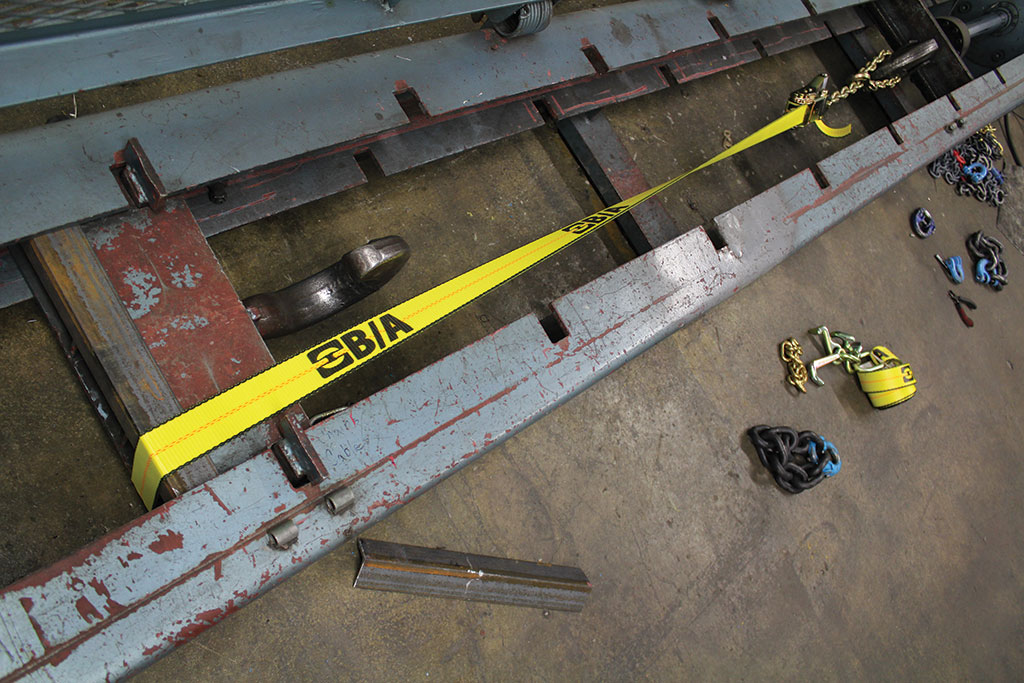
Let’s get to the testing. For each item, I loaded 3 samples over the angle to get a good average break, and did either a straight pull test or used test results from my files for each product to use as a control sample.
First up was a cluster tie down strap, rated at a 4000 Lb. Work Load Limit, 12,000 Lb. minimum break strength. Keep in mind that the minimum break strength (MBS) should NEVER be used as a rating or for selecting a tie-down, strap chain or wire rope.
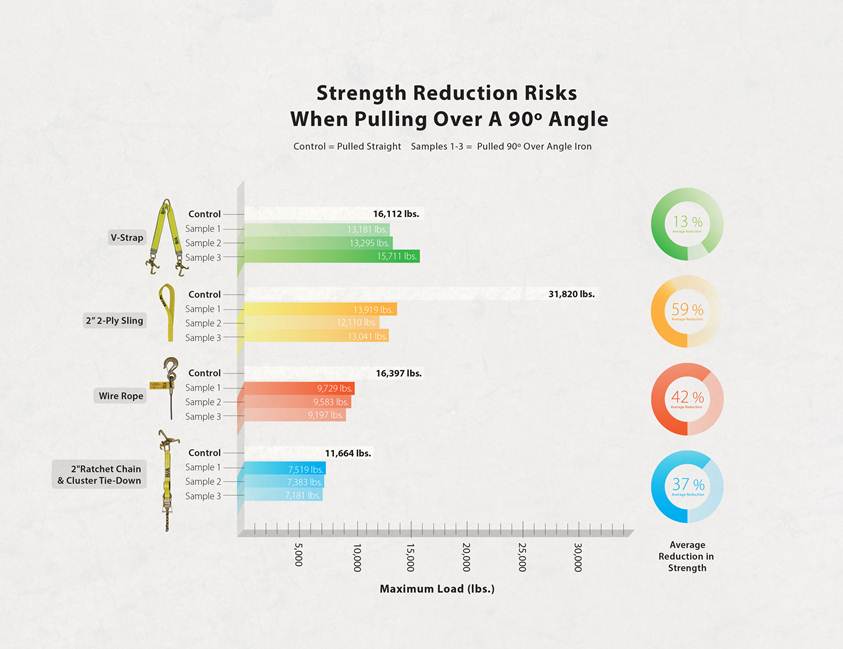
The control sample broke at 11,664 Lbs. As you can see from the photo, the webbing shredded at the stitching. The straps were set up with the free end of the strap wound up in a ratchet, and the mini J of the cluster hooked to the underside of the test bed. The samples that were pulled over the angle were marked where the web contacted the corner, and two inches on either side of the angle. Force was applied until the samples failed. As the force increased, the web stretched and the contact point with the angle moved about two inches. Failures occurred at 7519, 7383 and 7181 Lbs., all where the web contacted the angle.
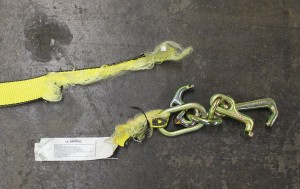
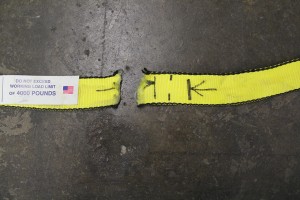
Notice that the strap pulled over the corner is cut cleanly across the width of the web, and all or nearly all the fibers are the same length, with minimal fraying. Compare these with the control sample. This is the indication that the webbing was cut. The average failure was at 7361 Lbs., for a 37% reduction in MBS. Look at it another way: Work Load Limit is based on a ratio of the MBS. In the case of this strap, the 4000 Lb. WLL is a 3 to 1 ratio of the 12,000 Lb. MBS. Since our MBS over a piece of angle iron is 7361 Lbs., divide that by 3, your WLL is now 2453 Lbs. Now, I’m not suggesting that the straps be rerated because it is being pulled over a corner, but the reality is if the strap is pulled around a corner, the strap will fail at a lower load.
Let’s put a 2” two ply sling to the same test. WSTDA ratings for this sling are a WLL of 6200 Lbs. in a vertical hitch, with a 5 to 1 design factor for a MBS of 32,000 Lbs. My control sample failed at 31,820Lbs., the webbing again shredded at the stitching.
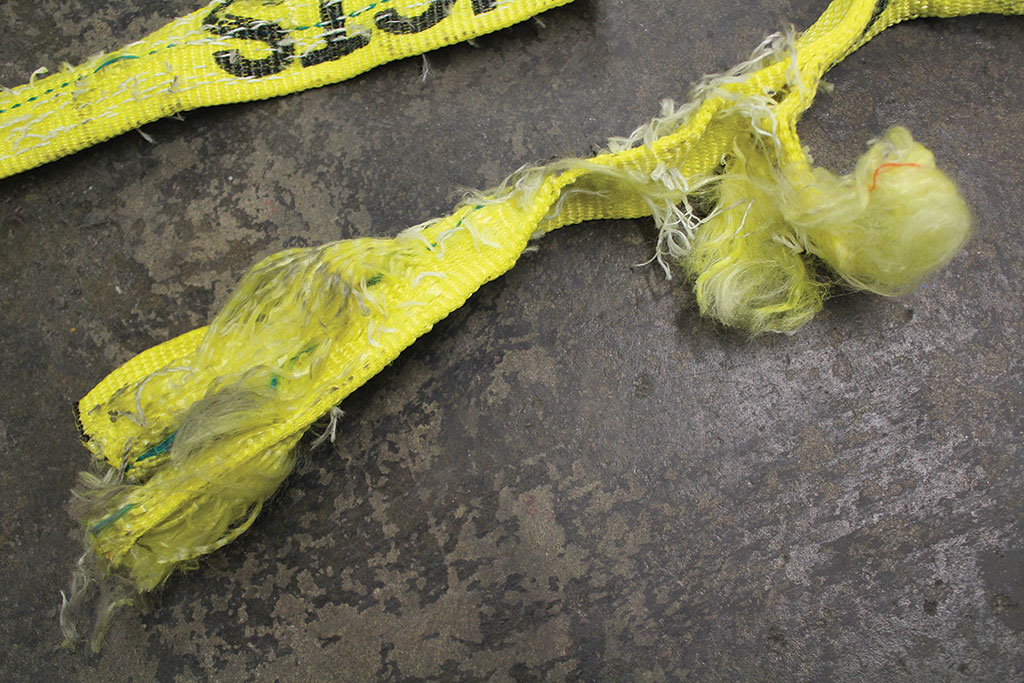
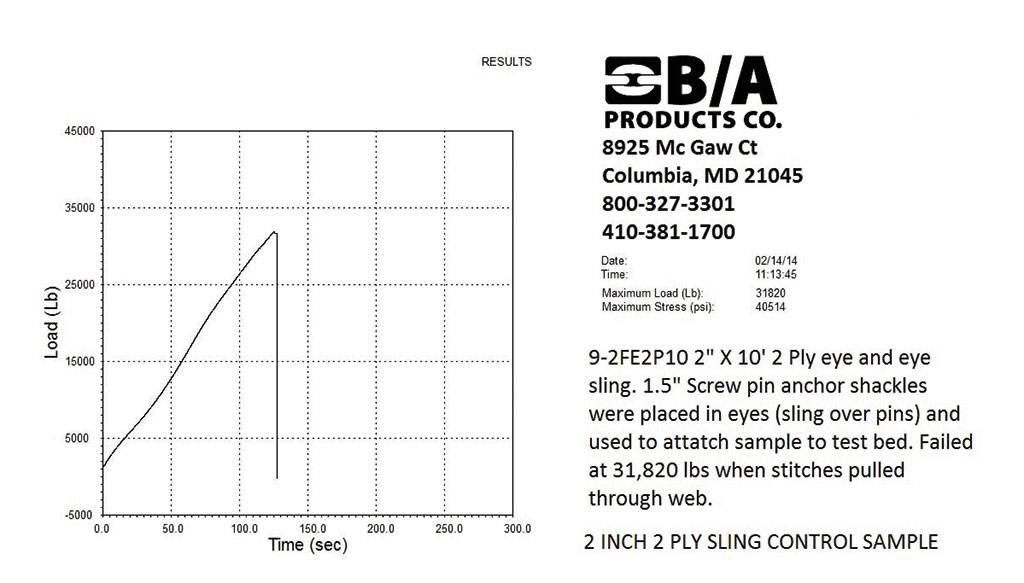
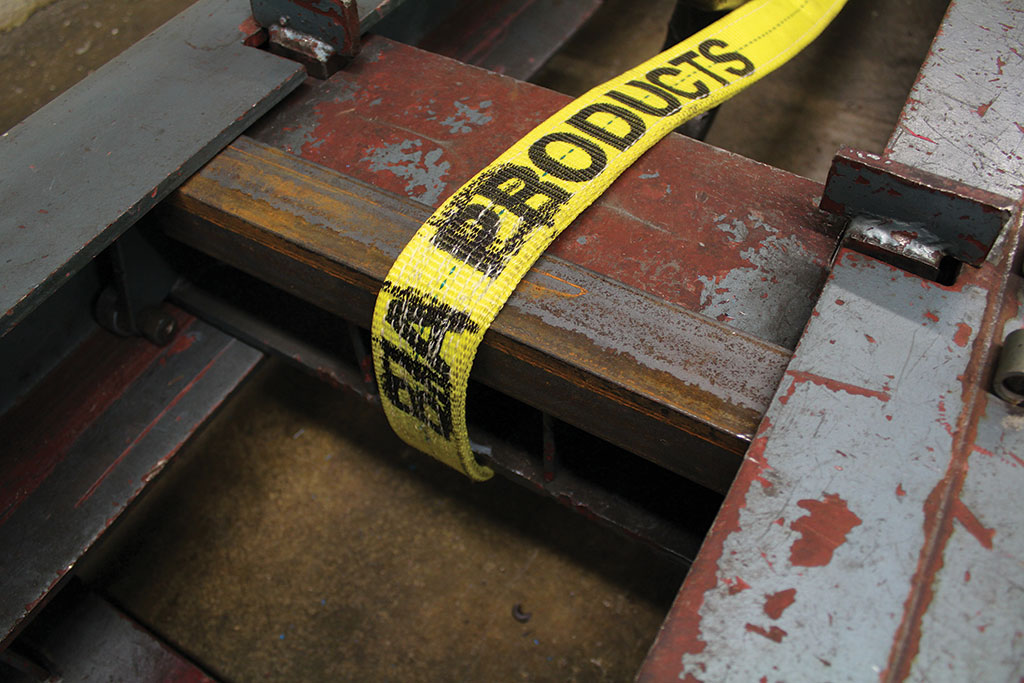
The test samples were installed in the test bed with one eye over the hook, under the carriage, over the angle and to the second test bed hook. The samples were marked the same way as the cluster strap, and force applied until failure. As force increased, the strap stretched until the 2 inch mark was adjacent to the corner. During one of the test pulls, the test bed ran out of stroke. (The ram was fully retracted before failure occurred. I did the testing over several days and this sample was hooked to the test bed differently.) I took the strap out of the test bed to reset the test and noticed the damage to the strap where it had been in contact with the corner of the angle. I’ll show you that damage a little later.
All three samples failed at the angle, with an average failure of 13,023 Lbs, less than half of the straps MBS. Using the same logic as the cluster tie down strap, the WLL has effectively been reduced from 6200 Lbs, to 2604 Lbs. Once again, I am not suggesting the strap be rerated; I am trying to illustrate how damaging loading over a corner can be. As with the cluster strap, the fibers at the cut are relatively even with minimal fraying.
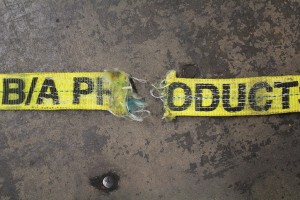
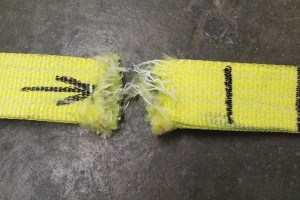
2 inch 2 ply slings after being pulled over angle. Arrow shows direction strap was being pulled.
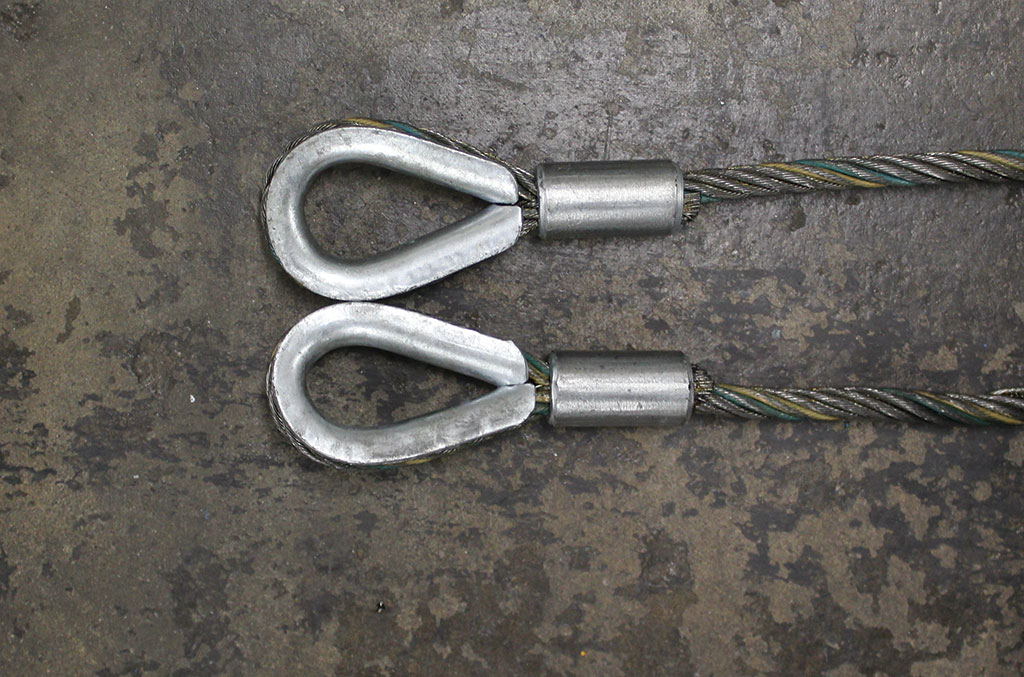
Let’s switch from web to wire rope for the next test. For this round, I tested 3/8” EIPS IWRC (Extra Improved Plow Steel Independent Wire Rope Center) made into 10 foot long sections with thimbled eyes at each end. The samples were attached to one hook of the test bed, laid over the angle on the carriage, then run under the carriage and tied off to a cross member of the tester.
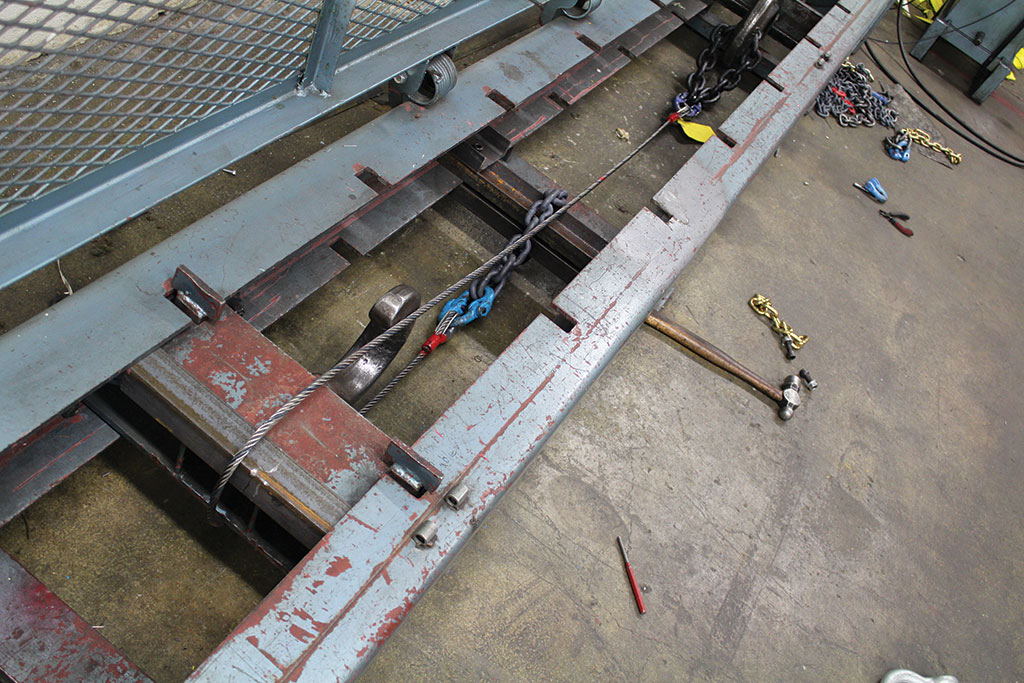
This resulted in the sample contacting the carriage in two places. In all three tests, the end of the wire rope attached to the movable hook of the test bed failed (the end having force applied), including one test that I inadvertently ran under the carriage to the hook (it failed on the edge of the carriage, not the angle).
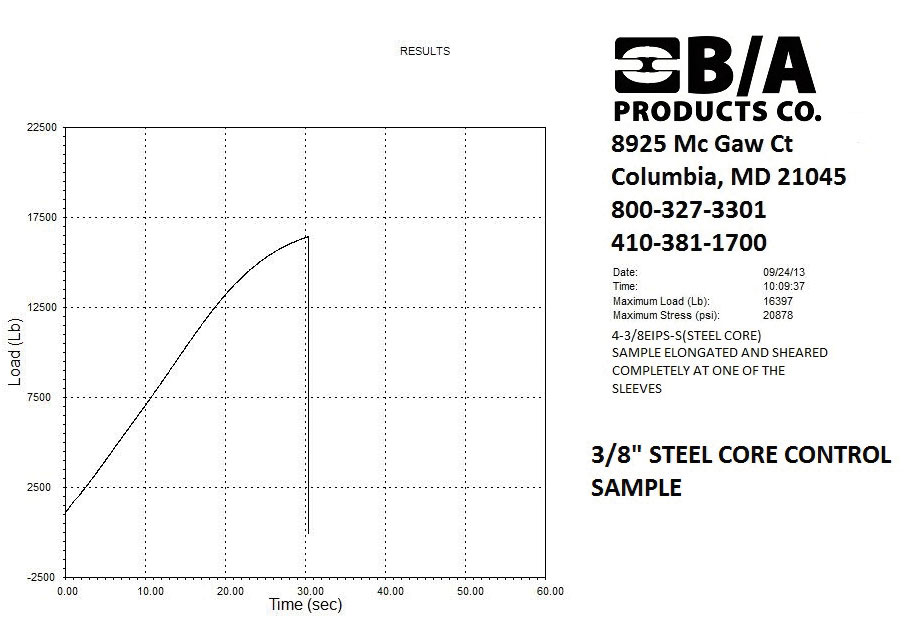
The control sample failed at 16,397 Lbs., at one of the swages.

The three samples pulled over the angle failed at an average of 9503 Lbs., a reduction of 42% from the control sample. In each case, the wire rope failed where it was contacting the corner. Four of the six strands failed on two of the samples, and two of six failed on the third. I stopped each test once the failure occurred. If I had continued to apply force, the remaining strands would have failed, but the load would have been lower that the first failure point.
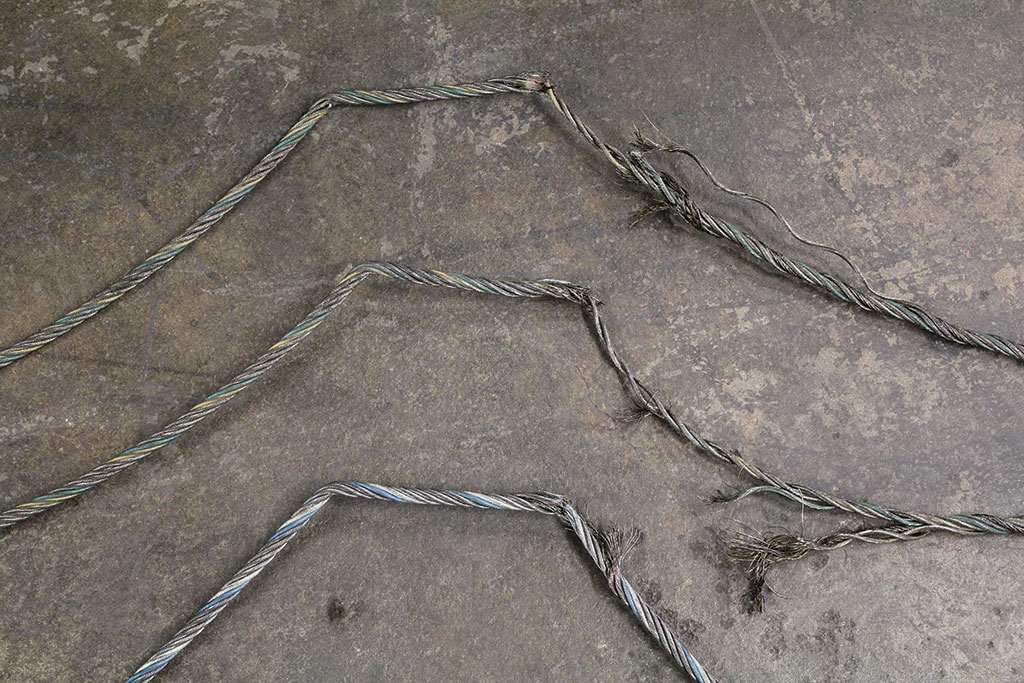

It should also be noted that the wire rope sample contacted the carriage on the test bed in two places, and the point where failure did not occur was damaged, as well.
So far, the testing has gone pretty much as I expected. All of the samples failed where they contacted the corner of the angle iron at an average of 46% below their Minimum Break Strength, due to the damage the corner inflicted. Next, I tested individual V strap legs, and things get very interesting. My goal was to recreate the damage you see here:
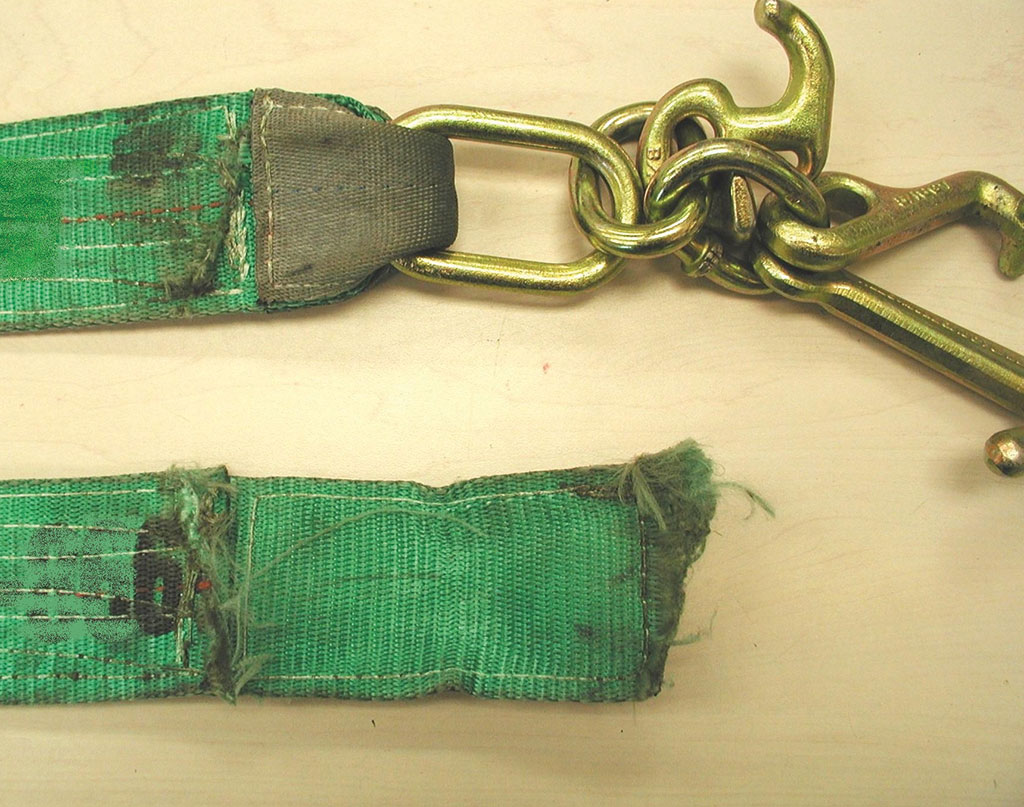
Take a look at the bottom leg. Notice how the fibers are smooth and even for the first two inches of width from the bottom. They compare very closely to the cut tie down strap and 2 inch sling shown earlier, but also take a look at the top leg. Notice the mark that mirrors the cut on the lower leg? Most likely both legs were riding against a cross member or control arms.
To simplify the testing, I had single legs of our V straps made up. Our V straps have a 4700 Lbs. Work Load Limit.
I set up the V legs so the last 3 inches or so of the strap was contacting the corner of the angle, and applied force. The first two legs I pulled got fairly high readings: 13,181 Lb and 13,272 Lb. On the third leg, I moved the contact point slightly and got 15,712 Lbs. Samples 1 and 3 were cut at the contact point with the corner, sample 2 was a cut on either side of the leg at the contact point, and then the oblong pulled through the remaining center inch or so of the eye. The control sample failed at 16,032 Lb., the oblong elongated significantly and cut through the web at the end of the eye.
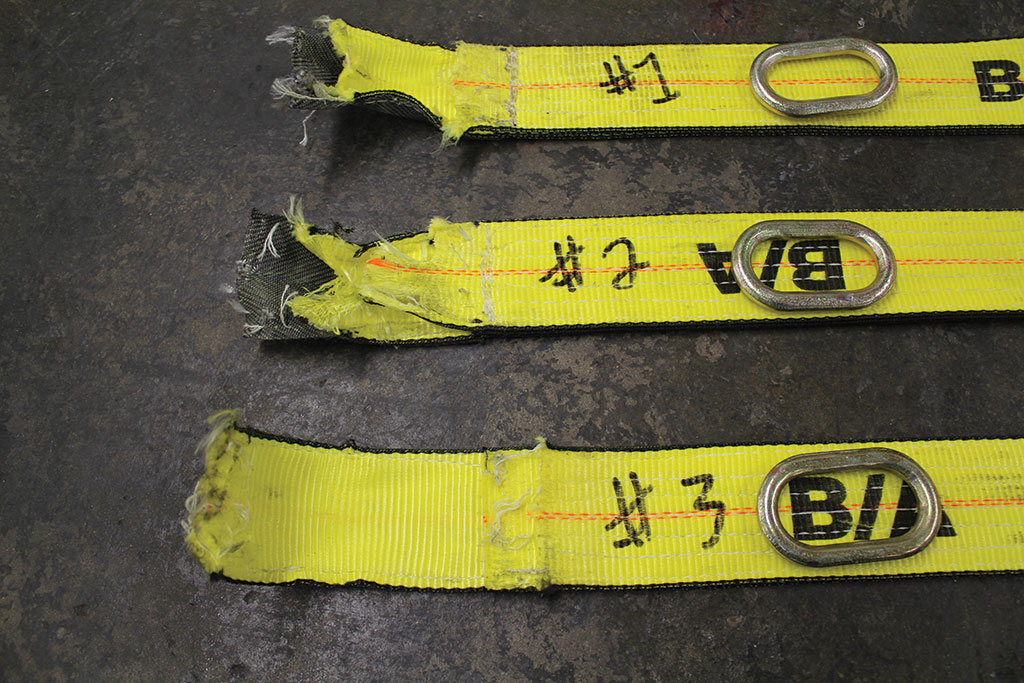
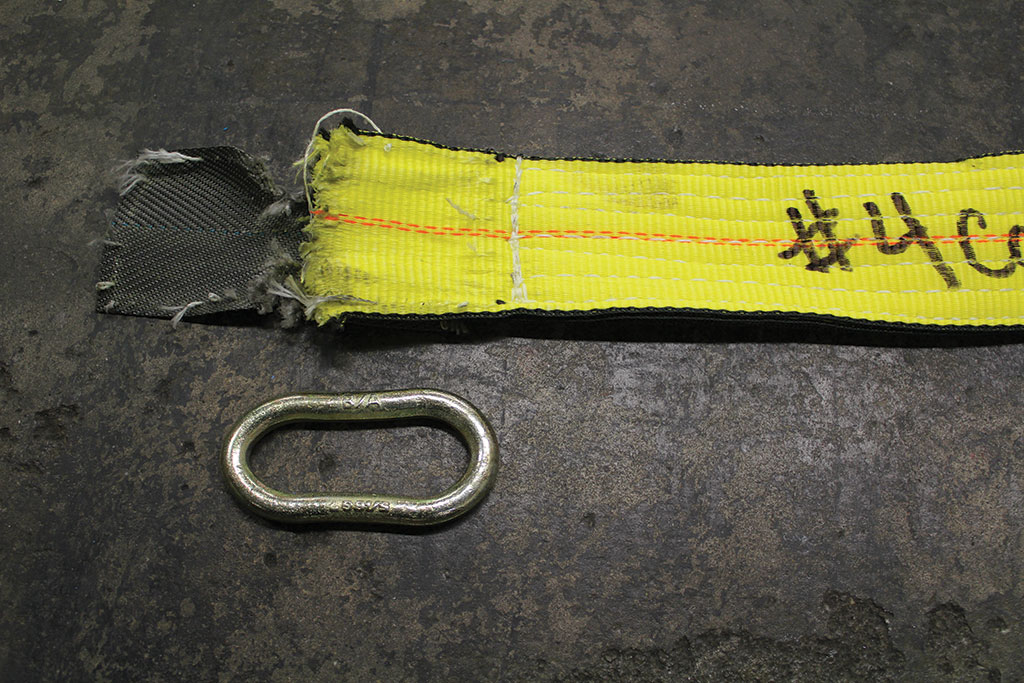
The average reduction in break from the control sample was 14%. Why is the reduction in MBS on the V strap leg only 14%, when the average reduction of the other parts is 46%? The V strap legs have a Cordura pad sewn over the eye at the hook end. In all 3 tests, the Cordura pad was at the angle or pulled to the angle when the leg stretched. That cordura pad made the difference. “But the control sample looks just like the other legs, the fibers are all the same length with minimal fraying. What gives?” I’m glad you have been paying attention. It’s time to talk about some of the signs of damage.
Let’s start with the V strap legs. In reality, the control sample was cut, as well. Take a look at the oblong links in the photo of the test samples then the oblong link in the control sample. The test samples elongated very little, which shows that they were not getting the 14,000 Lbs. or so average it took to break the sample. The oblong of the control sample elongated considerably, indicating it was seeing the full load applied to the sample. As it elongated, the contact point with the eye of the web became smaller and smaller, until that point could no longer support the load and the web failed. This is a good example of why it is important to check the entire assembly during routine inspections or after a failure. The example of the green V strap shown earlier backs up this point. The side that did not fail shows that there was contact with an object.
WIRE ROPE: The samples were pulled over two 90 degree angles; one end was tied off to the frame of the tester, the other end tied off to the ram of the tester. Failure occurred at the 90 degree angle closest to the ram (even on the sample I ran incorrectly). Where the wire rope contacted the second angle, there was damage, as well.

This damage creates a weak spot that can fail when a load is applied later. Also take a look at the photo of the break in the wire rope while it is over the angle. The ends of the individual strands show two different configurations. Some are flat, like a chisel or knife blade. This is an indication of mechanical damage, such as crushing or being bent around a corner. Others show a cup and cone shape. When an individual wire is overloaded, it will stretch. When it cannot stretch any more, the wire breaks. One side of a break looks like a cone, the opposite side like a cup. Overloading will also leave signs. The thimble will stretch at roughly twice the Work Load Limit of the wire rope.
WEB SLING: I mentioned that during the testing I had to reset the strap and noticed damage. The strap had been pulled to 12,109 Lbs. Here’s the damage:
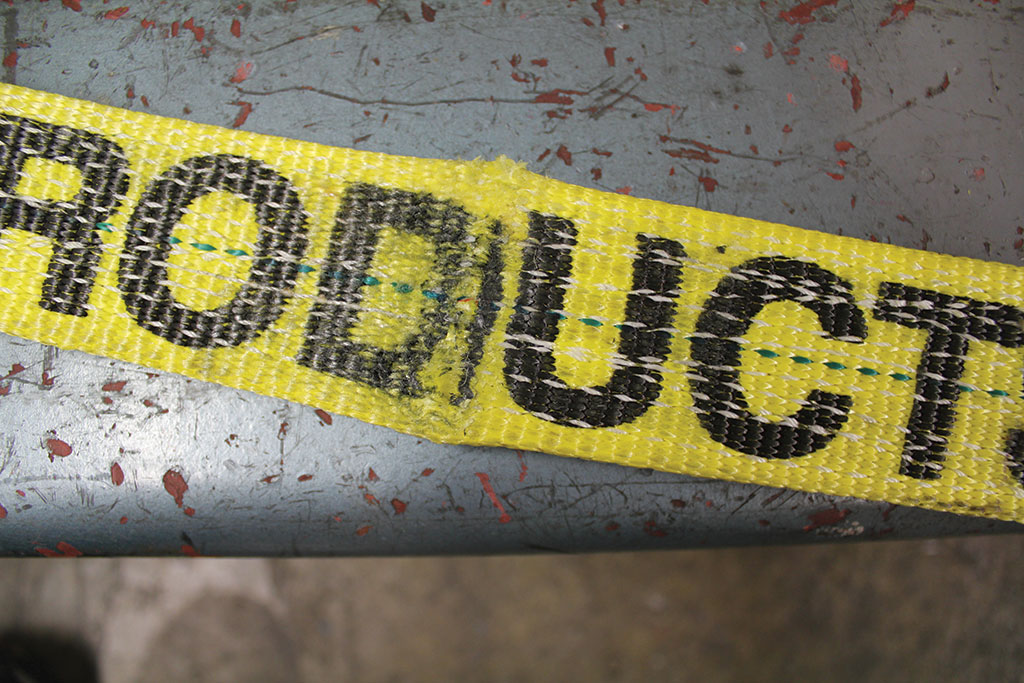
When the strap was reset and pulled again, it failed at 12,110 Lb., 1 pound over the previous pull. Do you think the damage had something to do with that? Compare the previous photo with the photo of the strap after it was pulled the second time. It failed in the same place. Still not convinced? That strap broke lower that the other two by almost 1000 Lbs. Once again, previous damage can and will weaken the assembly.
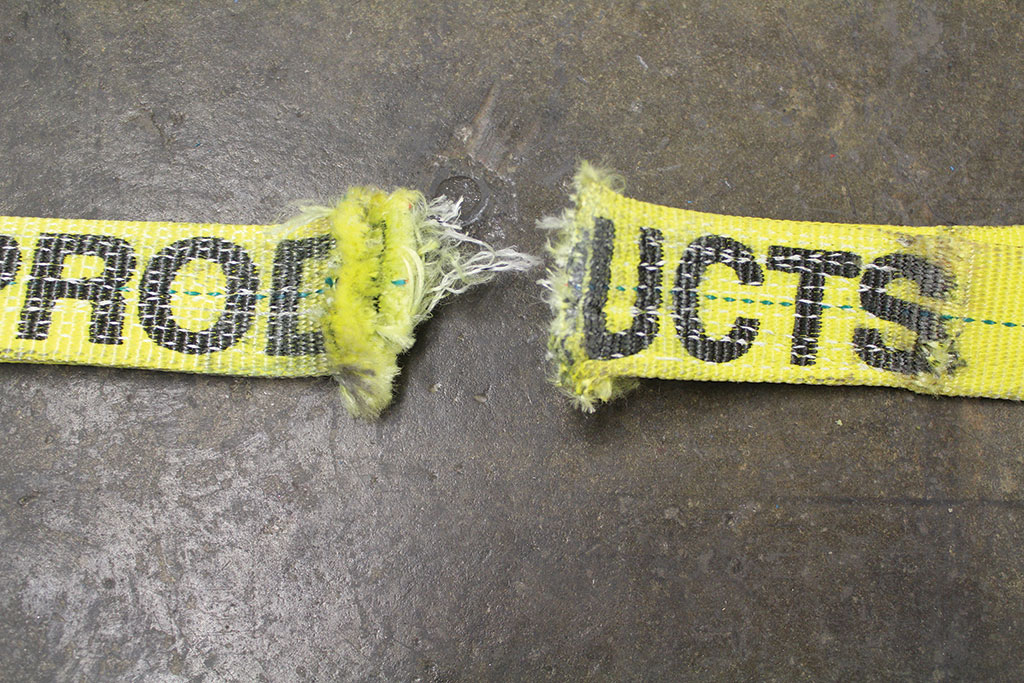
Also notice the wear and marks at the letter “S.” In the test set up, the sling contacted the carriage of the test bed in two places. While most of the load applied to the strap was concentrated at the angle where the strap ripped, there was enough force at the second corner to create additional damage. All of the 2 inch slings and the cluster tie downs exhibit this damage.
So, how can these failures be prevented? What kind of inspections should you be doing? And what about chain? I’m going to cover those subjects next month.
One thing before I go: In the opening, I talked about going to WSTDA meetings and some of the topics of discussion. Please don’t get the wrong idea; I really do enjoy the meetings. And yes, those are really topics we discuss. The answers, in case you are interested: 12” sling testing pin diameter 4.5”, span 13”; minimum corner radius for round sling, depends on the sling, a yellow round sling is 5/16”, and no, slings should not be machine washed (or washed at all).
Fritz Dahlin is vice president of B/A Products Co., www.baprod.com.

